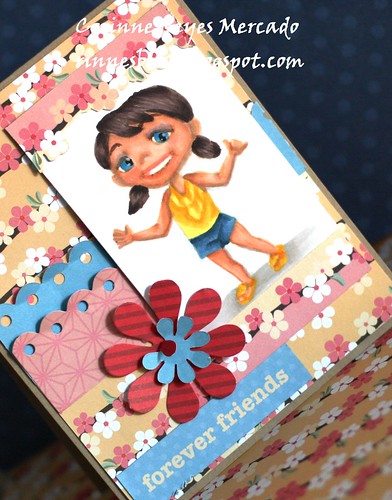
Sunday, October 6, 2013

#25 Photo Inspiration Challenge Reminder

Happy Sunday!  Oh my...we have been busy this past week at Y&FH!

Hopefully you had the chance to join us on Tuesday to wish our very own Team Fumi Kathy Dinh a Happy Birthday. We'd love to have the celebration continue with any/all belated wishes...HERE.

Maybe you had time to stop by on Thursday and see Corrine's No-Line Tutorial? If not, you might want to scroll down so that you don't miss her helpful tips on creating a successfully colored image with this wonderful technique.

And currently, Y&FH is in the midst of  their 2-week PHOTO INSPIRATION challenge. Lucky you because you haven't missed it and still have time to join in the fun!!  Here are some gorgeous cards created by Team Fumi who is hoping to spark your creativity using this gorgeous photo:


****************************
Here is Sheena's card
using Yumi Peace Sign from the Kimono Series


Blankina's card uses
Yumi with Birdie from the Peek A Boo Spring Series


Kathy used the adorable
Yumicorn from the Kigurumi Series on her card


Melissa topped her card
with Chuckles from the Hang Loose Series


Denice's tag uses
Yumi with Fan from the Kimono Series


Leanne's sharing a card
using Fumi with Turtle from the Peek A Boo Spring Series


***********************
For more details on each of these tags/cards please visit the DT's individual blogs
 by clicking on their names.
***********************
  • You can now use ANY stamped image in our bi-weekly challenges.
  • As a bonus for using a Y&FH image, your name will be added a maximum of one (1) extra time after the last linked entry.
  • All projects/cards must have a hand-colored image, "sentiment only" cards are NOT allowed.
  • One (1) entry per person.
  • All of the challenge rules can be found HERE.
  • The winner will receive a $10 gift certificate to the Yumi  & Fumi Handmade online store. The Top 3 will receive a 10% discount code to be used in the Yumi & Fumi Handmade online store.
We would love to have you join our Photo Inspiration challenge which runs until Friday, October 11th. Feel free to scroll down or click HERE to find the original challenge post and link your entry. The winner and Top 3 picks will be announced on Saturday, October 12!
 
Now it's your turn to craft, create, and have fun!!!
Good Luck to all of the entries!

Thursday, October 3, 2013

No Black Lines Tut.

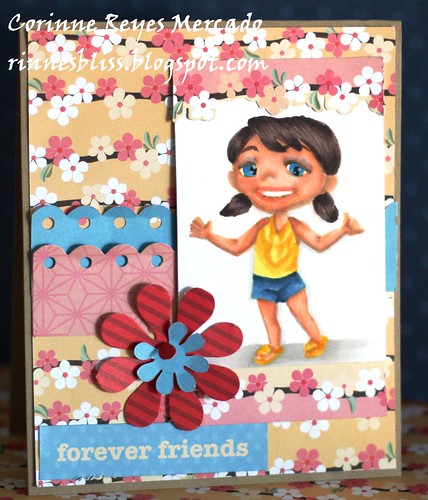
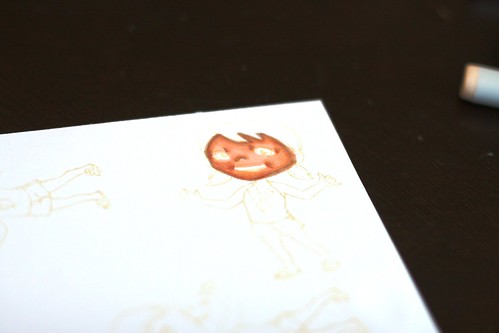
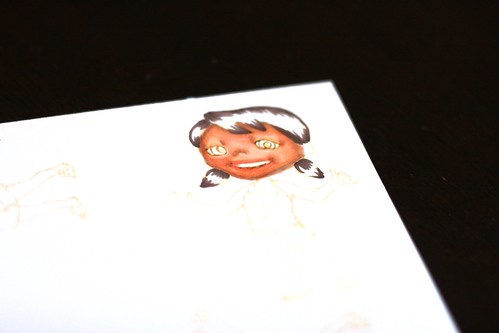
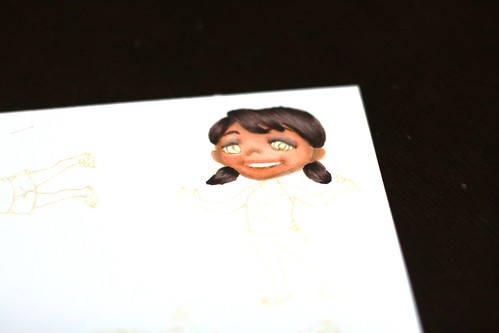
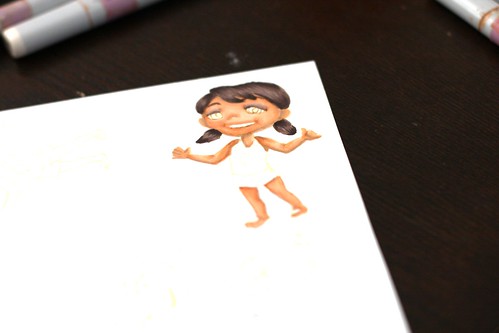
Good Thursday morning, everybody! It's Corinne, and it's my turn to show you the no-lines coloring tutorial! It's super fun to do, but also kinda difficult (at first)! You just take those black lines for granted, don't ya? I love how it looks like a painting in the end, but boy, it's quite challenging!

IMG_9436

Summer Yumi is featured here, and although it is already Fall, I'm trying to get the most out of this flipflop wearing beauty!

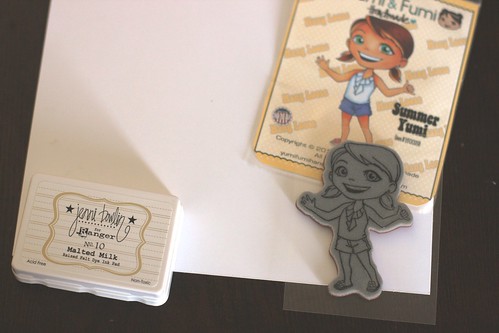
The first thing you have to do is get a light colored ink to stamp with.  I chose Malted Milk from Ranger's Jenni Bowlin series.                                                                                                                                                                                                                                                                                                                                                

IMG_9420

Just stamp the image as usual, making sure you've got plenty of light in the room. 

IMG_9421

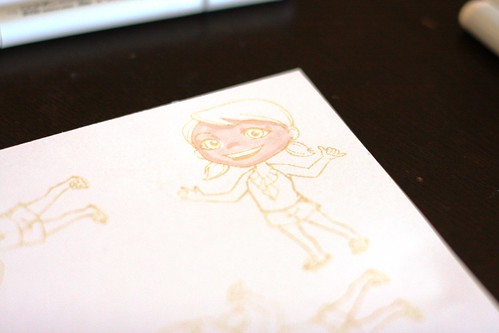
Go ahead and apply color as if you were coloring the image.  Make sure you add the usual shadows and shadings. 

IMG_9422

For example, I gave her eye lids, a contoured face, and full cheeks. 

IMG_9423

Blend really well.  If you have to, go ahead and keep an image of the black line version close at hand so you know where to put the colors next. 

IMG_9424

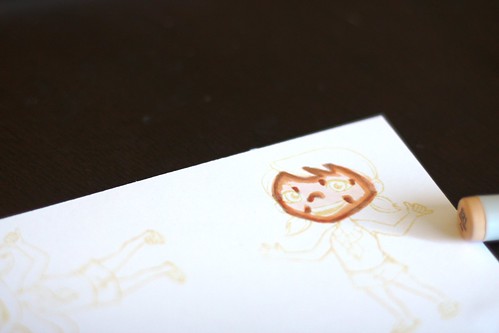
For me, the most difficult part of the no-lines coloring method is doing the hair.  

IMG_9426

I could never get the shadows and highlights done exactly to my liking.

IMG_9429

I also like to add a bit of "make-up" as eyeshadow. 

IMG_9430

Then, do the rest of the body parts, making sure you keep in mind where your light source is. 

IMG_9431

Finish up the clothing and details and voila! 

IMG_9433

I hope you enjoyed this tutorial.  It's always refreshing to try something new :). 

IMG_9437

Have a wonderful day!

Corinne
Team Yumi

Tuesday, October 1, 2013

Birthday Wishes for Kathy

Every day is a good day when there's a birthday to celebrate
and today is DT Kathy's birthday!

*HAPPY* *HAPPY* *HAPPY*

A few of Kathy's teamies have gotten together to wish her the happiest and brightest of days today! Not only do we wish her a fantastic day, we also hope at the end of the evening she's smiling from ear to ear from a day that's been filled with all things HAPPY!

*************


LISA
has used Yumi


LEANNE
using Yumi with Book Bag


*HAPPY* *BIRTHDAY* *KATHY*

We hope you'll stop by Kathy's blog and leave her a little birthday love!
 Be sure to return to our post through out the day...as even more of the Y&FH DT members will be stopping by with their wishes for Kathy!

HAPPY
Tuesday,
HAPPY
Day!

Sunday, September 29, 2013

Challenge #25~PHOTO INSPIRATION!

Happy Sunday everyone!! Hard to believe it's the end of September already...man these months are flying by. I feel like this entire year is speeding by so quickly!! Although it should be cooling down for a lot of us in the U.S., it's still HOT in Texas! I'm hoping a cool front starts moving in soon. I'm so over dealing with the 90s and 100s. FALL is my favorite time of year and I LOVE to layer clothes!

We are back today to introduce a new challenge!! But before we get to that, you may want to scroll down to see if you were a winner and Top 3 from our previous Challenge #24.

Before linking your card please read our new challenge guidelines by clicking HERE. Don't forget that we allow ANY stamped image!!! You HAVE to use a hand-colored image on your project...no "sentiment only" cards allowed. However, if you use a Y&FH image your name will be added a maximum of 1 extra time after the last name in Inlinkz. Remember also....only 1 entry per person.

What's up for grabs? The winner will receive a $10 gift certificate to the Yumi & Fumi Handmade online store and our Top 3 will receive a 10% discount!!

Now on to Challenge #25! The challenge for the next two weeks is this gorgeous PHOTO:
 I love pink and green together! And this table arrangement is just AMAZING!! Here are some amazing samples from Team Yumi to get you inspired.

Cebelica
...using Fumi with Gift
 

...using Fumi with Gift
...using Winter Yumi

...using Fumi with Gift

We hope you will join in our "Photo Inspiration" challenge using ANY image you like! We can't wait to see what you make!! Remember, only 1 entry per person. You have until Friday, October 11th to join in our challenge. We'll announce the winner and top 3 picks on Saturday, October 12th!

Good Luck everyone!!

Hugs!
Team Yumi

Saturday, September 28, 2013

CH #24 Winner & Top 3

Good morning!
 
Thank you to everyone that participated in our Christmas tag challenge.  They were all beautiful and unique and I'm sure will definitely bring a smile to the one you gift it to on Christmas day.  We had a total of 5 entries, however only 4 qualified for the drawing and 1 crafter who used a Y&F image got 2 entries!!  By using Random.org to choose the winner I am happy to announce Congratulations to...
 
CHALLENGE #24 WINNER - Linda Tan
 
Congratulations Linda, you are the winner of a $10 coupon to the Yumi & Fumi Handmade online store!!
  Woo Hoo!!  To claim your prize please email Renate' (yumi@yumifumihandmade.com) by Monday.
  
** In the subject line please make sure to copy & paste the following: I’m a winner - CH#24! 
 
You also get to choose one of the awesome badges below to be personalized with your name. Please include the badge number in your email to Renate' and she'll personalize it and email it back to you so that you can display it on your blog!  Congratulations!!


Next up are the Top 3.  It was a pretty easy decision, this time around.   Here they are in no particular order:
 
 
Congratulations everyone! You will all receive a 10% discount code to the Y&FH online store!  To claim your code please email Renate' (yumi@yumifumihandmade.com) by Monday. 
 
  ** In the subject line please make sure to copy and paste the following: I’m TOP 3, CH#24! 
 
You also get to choose one of the awesome badges below to be personalized with your name.  Please include the badge number in your email to Renate' and she'll personalize it and email it back to you so that you can display it on your blog!  Congratulations!!
 
We hope you'll come back for another fun challenge that starts tomorrow.  
Have a fabulous Saturday!!!
Aloha!!
Hugs,
Leanne
 

Friday, September 27, 2013

Belated Birthday Wishes Denice!!

Good morning everyone and Happy Aloha Friday!

You still have until noon pst today to link up for the current challenge.  Click HERE for all the details.  

Today we're having a little celebration for our teammate Denice!  We missed her birthday and feel really bad about it. :( So today some of the girls from Team Yumi & Team Fumi and a special guest are sending her some belated birthday wishes...

Happy Birthday to you!!
Happy (belated) Birthday dear Denice!!
Happy Birthday to you!!

Here are a few birthday messages from the team...

"I hope your birthday was terrific!" ~ Lisa T.
"Happy Birthday Denice!" ~ Taylor U.
"Happy Belated birthday to my fellow Virgo and super awesome crafty friend!  I don't see why we can't extend the celebrations for the whole month of September. Wishing you all things wonderful always!" ~ Leanne

Next up we have some very beautiful and fun birthday projects just for Denice.  Hop over to each blog and leave them some love.  First up is our special guest...

Danni B who created this super sweet card featuring Summer Yumi:


Blankina used Yeti Yumi for this lovely pink & blue card


Here's Sheena's adorably bright card featuring Fumi w/ Turtle:
 

Kathy is up next with this gorgeous card featuring Fumi w/ Umbrella:


Olivia used the only boy in this post, give it up for AJ:
 
 
Rosie used Fumi w/ Turtle to make this super fun card!:


Cebelica created this beautiful card featuring Fumi with Gift, love all the butterflies!! 

 
Corinne created this AWEmazing tag with Summer Yumi:
 
 
Melissa with this fun birthday card featuring Yumi:


Happy Happy Belated Birthday Denice! We hope you enjoyed the show!!
Now stop by Denice's blog and leave her some birthday love!!

Thanks for stopping by today!  Happy Aloha Friday!!

Hugs,
The Team

Thursday, September 26, 2013

Stamping on Tile!

Hi all, Melissa here and I'm going to show you how easy it is to stamp on tiles.  You can make your own drink coasters, tiles for your floor or walls...endless possibilities.

The supplies you are going to need to get started are your Yumi and Fumi Stamps, a Brilliance ink pad, and tumbled tiles.  Yes, my picture shows a StazOn pad, but you want Brilliance ink for stamping on tile.

Wipe off your tiles and let dry.  They always seem to have a powdery dust on them and you can't stamp on that successfully.


Begin stamping normally.  I used a small piece of paper to cover the bottom tiles when stamping so I didn't get any transfer that I didn't want.


Once you have your images stamped you must let them dry, dry, dry!!  You can help this along with a heat gun, but I let mine set overnight.  The images appear to be very clear, you don't notice how porous the tiles are until you start to color them.


Since they dried over night they are ready to go.  You will need  Copic Various ink, paint brushes or aqua brushes, and Copic Colorless blender.  I used a smooth tile as my palette and put single drips on it from the Various ink - you don't need much at all.  I also used paint brushes, they are more my thing than aqua brushes.  You really don't want to use your actual markers because the tiles will ruin your marker tips.


Using the tiniest bit of color on your brush you start.  Once you start to paint you will notice that since the tile is  porous the ink is sucked in quickly, and sometimes you will discover holes or chips become much more obvious.  They may fill with ink and appear darker (like my stamped Winter Yumi stamp-she has the hat).  Remember this is not paper, there is no true blending with the Copics on this because the ink sucks in.  Let the colors dry between applications (which happens quickly). Use the Colorless blender to dampen the Various ink colors on the palette when they become dry - remember you don't even need a drop to do this.


I wasn't thrilled with the way two of my tiles turned out because of  the appearance of holes and chips once painted so I separated them. Then I did some touch up work which included AJ's hair and I gave Fumi (with Bear Backpack) a little cheek color.


Once you have your images as you like and after they are completely dry you will want to apply a Sealant like Krylon.  If you are using your tiles for a coaster I would also recommend you pad the bottom with felt or material so the tiles don't scratch your table.  I also recommend that you have extra practice tiles, they don't always turn out the way you expect, but it is easy and fun to do.